
Step one of the milk ladder: What you need to know to get started…
All your questions answered about step 1 of the iMAP milk ladder challenge. Written by Registered Baby and Child Dietitian, and Milk Allergy Specialist, Christina Hills.
Ok, so you’re you’re ready to start the milk ladder...
In this post I’m going to answer all your questions on step 1 of the milk ladder
Starting step one can feel like a huge deal, as parents have usually had quite a journey before getting here. It can also be quite daunting for some, as milk has caused unpleasant reactions in the past and you might be worried about how they are going to react.
On the flip side, it is also really exciting to think that your little one might be starting to tolerate milk again soon – even if just in tiny amounts…
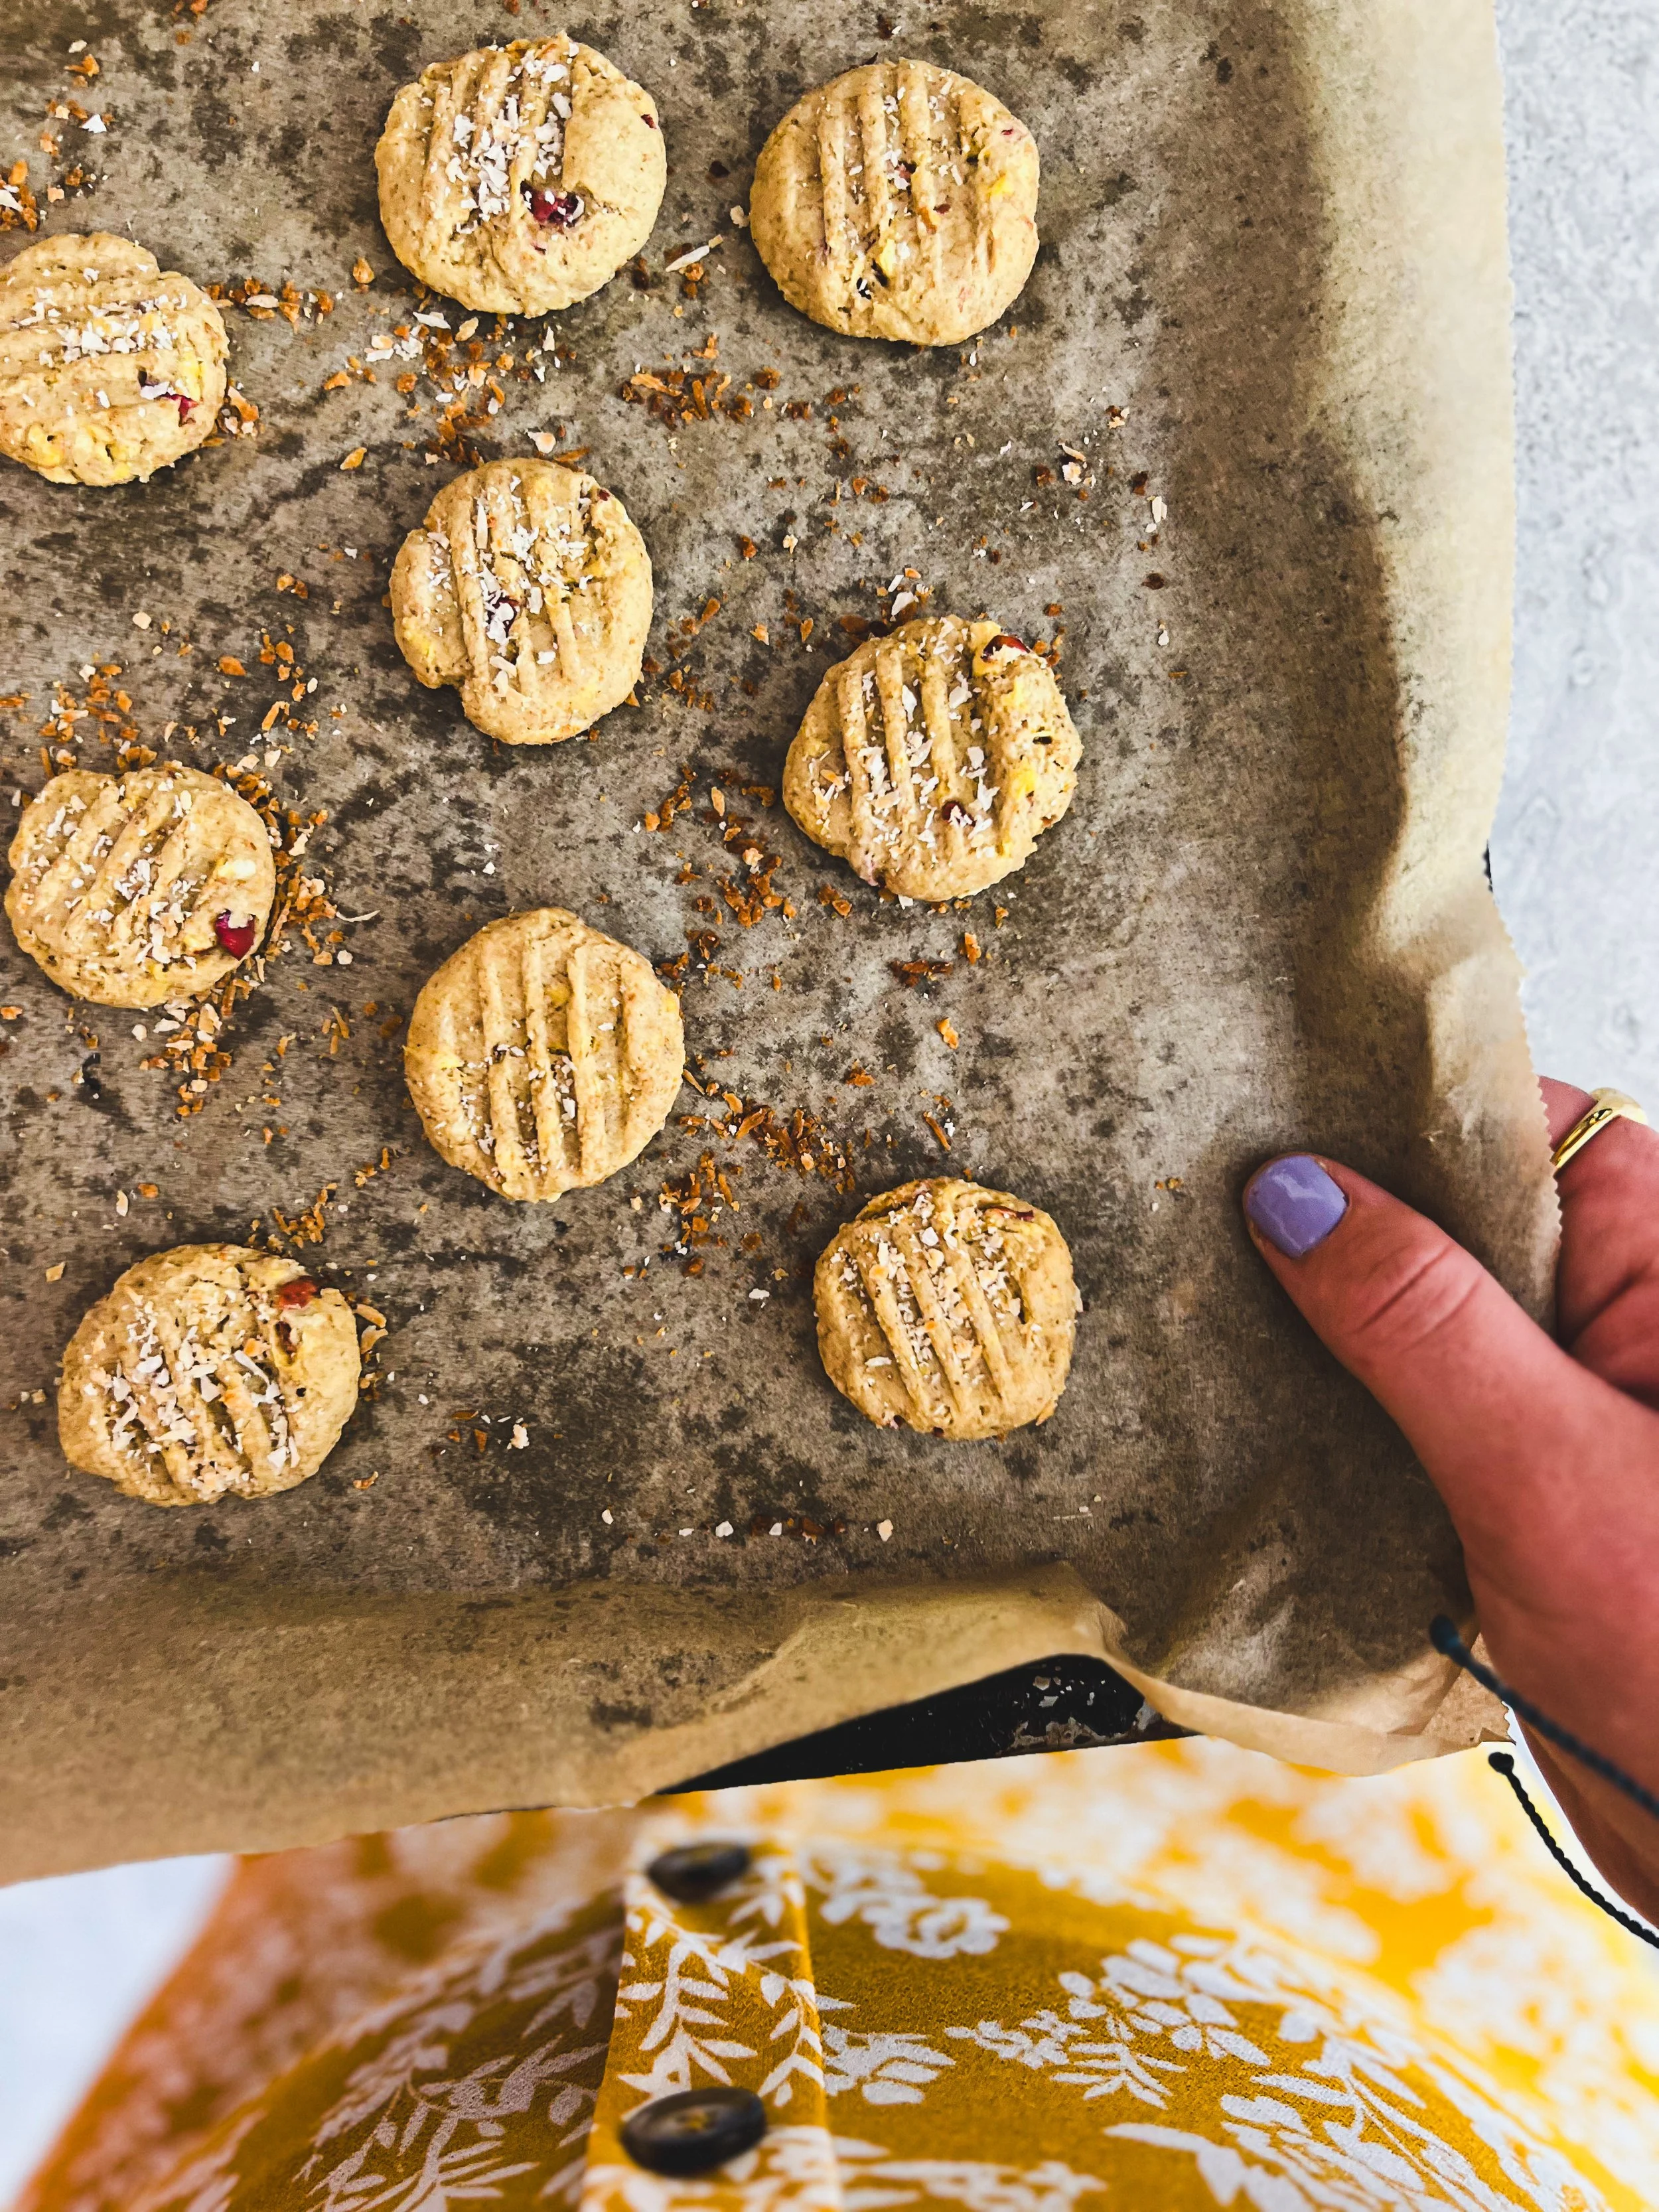
Biscuit recipe for step one of the milk ladder.
So what is a milk challenge or a milk ladder?
Babies with a delayed (non-IgE) milk allergy are usually advised to completely remove milk from the diet for some time after their initial diagnosis- think of this like a cooling off period - where any milk allergy symptoms settle down and baby can just enjoy life and be merry!
After this period we usually advise to introduce some milk to check for any tolerance to milk.
Well, a milk ladder is just that- a structured approach designed to help reintroduce milk in a safe and controlled way.
Studies have shown around 50% of babies with a milk allergy will have developed full or partial tolerance to milk by their first birthday- yay!
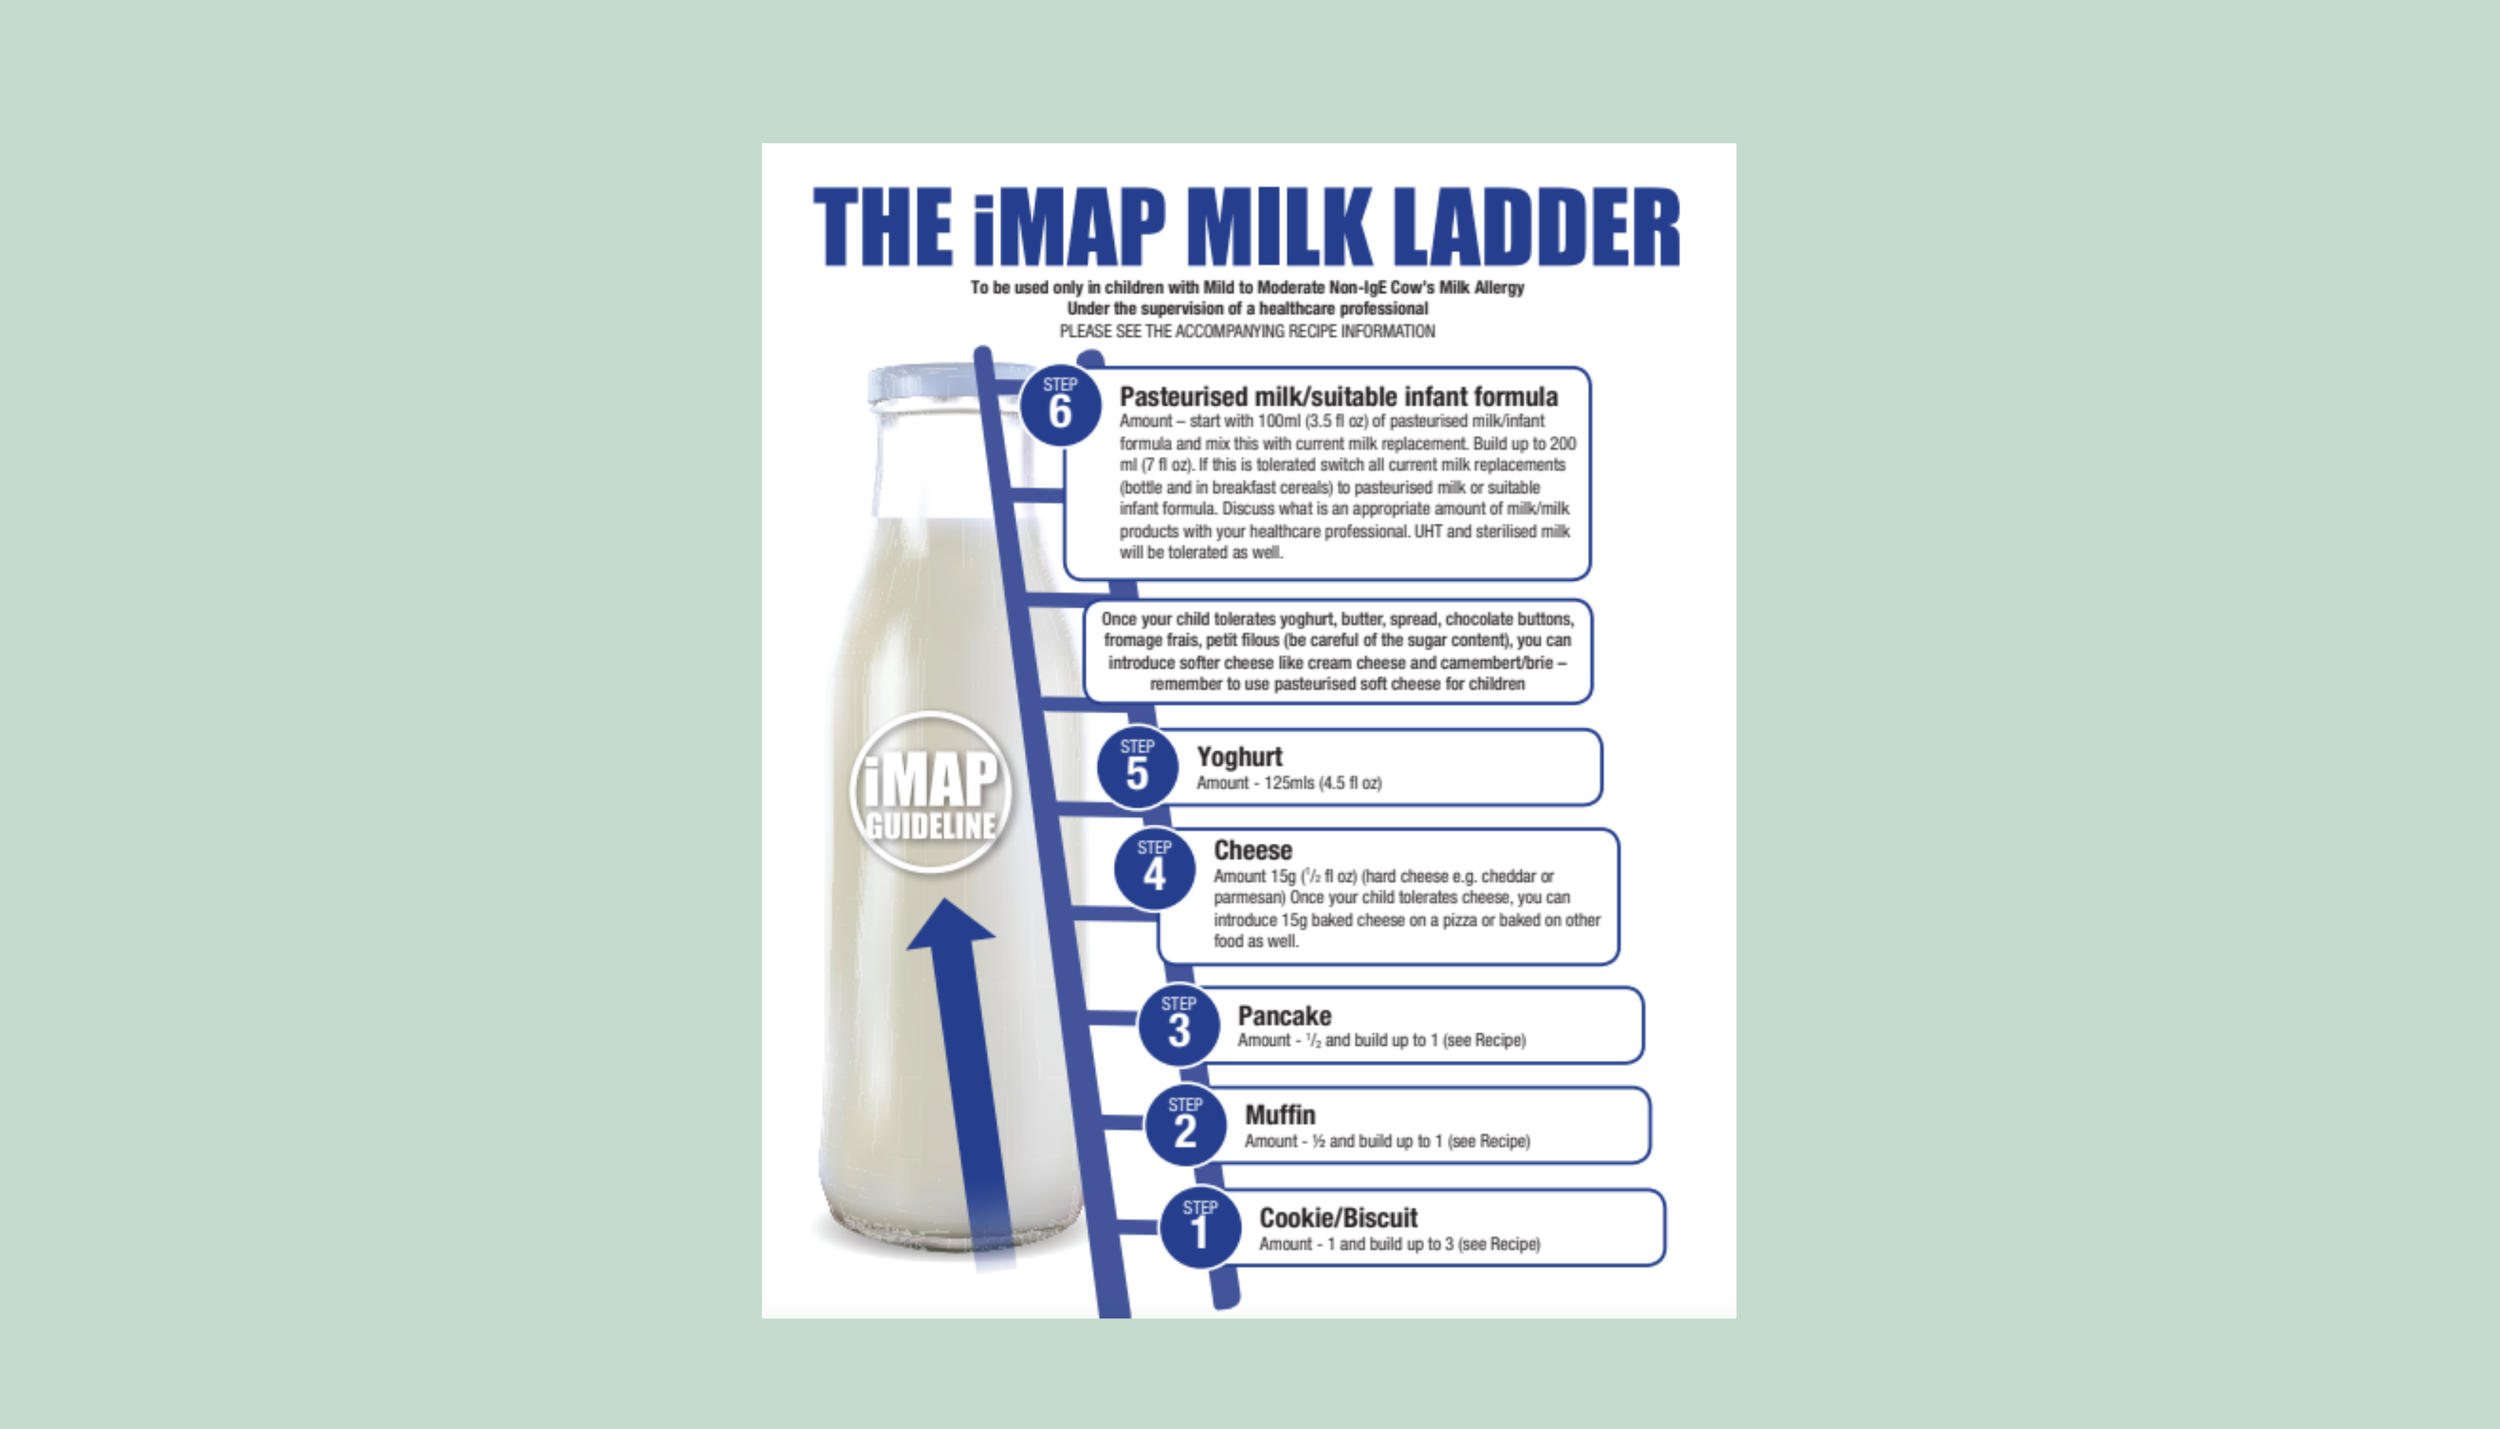
So it makes sense that we do something around this time to see what’s going on with their allergy progress. There are lots of different approaches to doing a milk challenge, this guide is based on the iMAP 6-step milk ladder which is used commonly in the UK for delayed/non-IgE milk allergy babies.
If you are new here, check out: what is a milk ladder challenge here.

So, what is step one on the milk ladder?
Step one usually involves introducing baked milk in a flour matrix – where milk has been cooked at a high temperature for a period of time - like in a malted milk biscuit or a baby biscotti.
Why is baked milk first?
Milk proteins like casein and whey are the parts that typically cause allergic reactions. But when milk proteins are baked their structure changes. Some babies and toddlers who react to fresh milk (like in yoghurt or cheese) may tolerate baked milk just fine. This is why it’s used at the beginning of reintroduction – to test for gradual tolerance.
What are the options for step 1 of the milk ladder?
The options available to you depend on which milk ladder you are using and whether your little one has IgE or non-IgE milk allergy. This guide is based on the 6-step iMAP milk ladder and the following options are recommended:
Options for step 1 of the milk ladder:

Malted milk biscuits (shop bought)- not my personal fave as they are high in sugar and the brands have differing amounts of skimmed milk powder in them, thus the target amount can be tricky to determine. But these biccies are easy to source and if your baby passes both step 1 + 2 on first try they are unlikely to need to eat them more than a handful of times!
Shop bought baby rusks- again milk protein amounts can vary, but these are more favourable from a sugar perspective
The homemade iMAP milk ladder cookie recipe is preferable as no added sugar and amount of milk is controlled, however, it does requires baking. Check out the iMAP biscuit recipe here

Checklist before you start
Make sure:
Your child is well – no illness, teething, belly bugs or other issues
No vaccines are due in the coming week
No new medications have been started recently which could present with side-effects
Usually any anti-histamines are stopped before starting a ladder challenge- but check this with your healthcare team
Eczema should be stable and under control
You should feel confident in what a milk ladder is and what to do at each step before your start
Most importantly, you should have been given the go-ahead by your dietitian or allergist that your baby or child is ready to start the ladder and it is safe to do so!
Top tips
Start small – a crumb or small bite at first! This will reduce the chance of an allergic reaction happening 👍🏽
Offer food during the day and avoid offering food close to bedtime- or when it’s dark- so you can see your babies skin!
Stay with your child after offering the food. Observe closely for at least 2 hours. Watch for any delayed reactions - occurring up to 72 hours after initial exposure
If no symptoms occur, slowly increase the amount offered over 3–5 days (go slower if you suspect your baby is more sensitive to milk)
What to watch for
Every child is different. Some common signs of a non-IgE milk allergy reaction might include:
Non-IgE milk allergy symptoms
Skin symptoms: rashes, worsening eczema
Gut symptoms: constipation, belly pain, reflux, vomiting, diarrhoea, bloating
Sometimes mucus in poo, other times we see some specks of blood in poo
Mild-IgE type allergy symptoms include:
Skin: Hives, skin redness, worsening eczema
Respiratory symptoms: itchy throat, sneezing
Gut symptoms: vomiting, diarrhoea
Moderate to severe IgE allergy symptoms include: any of the above listed symptoms, plus facial swelling, wheezing and other respiratory symptoms, and anaphylaxis
>> Do not perform a home milk challenge if your little one has a history of any of these IgE type milk allergy symptoms
Stop the ladder and contact your dietitian, doctor or allergy team if you see any signs you’re concerned about
Guidance on how to start step 1 using the iMAP biscuit recipe
I usually recommend one of two approaches for starting step one of the milk ladder using the iMAP biscuit recipe. I base this on a combination of factors, including your little ones initial milk allergy symptoms and whether they have had any previous experience with traces of milk or baked milk exposures.
The standard ‘step-by-step’ approach follows what the official iMAP biscuit recipe recommends. My second approach is a more cautious approach and starts with a crumb amount. The ‘cautious approach’ is useful for determining the individual tolerance level in very sensitive babies and toddlers. I might recommend this if baby has reacted on step one before, or if they have other risk factors such as eczema or other food allergies before starting.
Here are my two step one build up protocols (also pictured below):
Option 1: Day 1: 1 biscuit, Day 2: 2 biscuits, Day 3: 3 biscuits (standard iMAP approach)
Option 2 (cautious approach): Day 1-3 a small crumb, Day 4: 1/4, Day 5: 1/2, Day 6: 1 - now you can follow the standard step-by-step plan on the previous page (increasing from 1-3 biscuits)
If a baby has reacted on step 1 before, I would usually use option 2 for the next attempt

Above: How to start step 1 of the milk ladder, standard approach (option 1)

Above: How to start step 1 of the milk ladder, cautious approach (option 2)
What if my child reacts?
First, ask yourself:
Could this be teething, illness, or a medication reaction?
Are symptoms mild (e.g. a bit of tummy upset, reflux, change in poo, unsettled behaviour, sleep issues)
If baby has a mild reaction:
If baby has a mild reaction at step 1-3 → We usually advise to wait around 2-3 months before retrying
If only a tiny amount caused a reaction (e.g. a crumb) → We might advise you to wait even longer than this- 5-6 months before retrying again
However, there is no blanket rule and it really depends on the individual get individual guidance from your dietitian if unsure!
How long should my baby or child be on step one?
There is no set amount of time a baby will stay on step one of the milk ladder. It depends on the individual level of tolerance. Some babies will get through step one in a couple of days as they have a high level of milk tolerance, others may react and need to either completely remove milk, or try again using a more cautious approach (see option 2 above). If your baby tolerates baked milk in step one recipes, they may not tolerate the increased amount of milk in the step 2 recipes and therefore they may need to stay on step 1 for a while longer. This is why there really isn’t a fixed or standard approach when it comes to managing food allergy or doing a milk challenge. I highly recommend a personalised plan for each baby or child when it comes to doing a milk ladder.
Download the original / official iMAP recipes here.
Need help navigating the milk ladder?
If you’d like one-to-one guidance to support a milk allergy diagnosis, reintroduction, or allergy-safe weaning, I offer 1:1 personalised consultations online in my virtual clinic to help you feel informed, and supported through every stage of your child’s allergy journey.
Each initial booking includes a full written report after the session and 2-weeks of email support to provide that extra layer of care. Book now and we could be speaking as early as today!


ChristinaHills, Milk Allergy Specialist, HCPC Registered Dietitian + Nutritionist